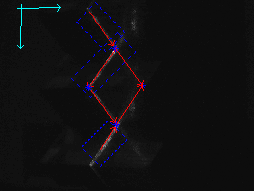
Examples 21-30
Example 21: Custom Scorpion Python extension
As a programmer, you can extend the Python language using modules written in C, C++ and even the .NET language C#, with the right glue in place.
Python scripts in Scorpion have access to all data being processed within Scorpion, and this example shows how to access and process the raw image data from Scorpion in a Python extension module. A grayscale image is represented by 8-bit pixels, stored rowwise. A colour picture would use four bytes per pixel, in the order <blue><green><red><pad>.
If you create a Python module called “myext” (source code below) that exports a Python function “average”, you can do your own image processing as follows, in a Scorpion Python script tool:
import arr,myext

im = GetImageMatr('1')
r,c = im.dim()
format = im.elemtype()
p = arr.getArrDataPointer(im)
avg = myext.average(p,r,c,format)
# avg now contains your result...
For instructions on how to create a Python module, please consult the Python docs, or “Python Essential Reference” by David M. Beazley, where you will find detailed documentation on how to create a Python extension. Below you will find the source code for the “myext” module, written in C. The “image processing” is done in the routine average, which gets a pointer to the image data. The routine _average is the Python interface.
myext.h
/**************************************************************************
* myext.h
*
* Skeleton Python extension
**************************************************************************/

#include "Python.h"

#define byte unsigned char
myext.c
/**************************************************************************
* myext.c
*
* Skeleton Python extension
**************************************************************************/

#define DLL_PREFIX __declspec(dllexport)

#include "myext.h"

// c image processing routine...

static double average(byte *image,int rows,int cols)
{
  double sum = 0;
  int n = rows*cols;
  int i;
  for (i=0;i<n;i++) sum += *image++;
  return sum/n;
}
Example 22: Accessing Scorpion Image Pixels
From Python you can manipulate the pixels of an image.
Example 1: Retrieve pixel value of row=417 and col=459
import arr
img = GetImageMatr('Image') # on RGB images use Image.I to retrieve intensity plane
ROWS,COLS = img.dim()
print 'image size ',ROWS,COLS

row = 417 # row is x when measuring with pixels as reference system
col = 459 # column is y
pixel = img[row*COLS+col]

print ' row, column, value ',row,col,pixel
ScorpionImage class simplifies image pixel access
def CreateScorpionImage(rows,cols):

  import arr

  class ScorpionImage:
    def __init__(self,rows=0,cols=0):
      if rows * cols > 0:
        self.im=arr.uint8Mat(rows,cols)

    # return number rows in image
    def Rows(self):
       R,C = self.im.dim()
       return R

    # return number columns in image
    def Columns(self):
       R,C = self.im.dim()
       return C

    # transfers image to scorpion image by name
    def SetImageMatr(self,name):
      SetImageMatr(name,self.im)

    # reads scorpion image to class
    def GetImageMatr(self,name):
      self.im = GetImageMatr(name)

    # resets image to zero
    def Reset(self):
      arr.setArr(self.im,0)

    # set pixel of image to value
    def Set(self,row,col,value):
      R,C=self.im.dim()
      self.im[row*C+col]=value

    # get image pixel value
    def Get(self,row,col):
      R,C=self.im.dim()
      return self.im[row*C+col]

  return ScorpionImage(rows,cols)
Example 2: Manipulate a Scorpion Image using ScorpionImage instance
image = CreateScorpionImage(0,0)
image.GetImageMatr('Image') # on RGB images use Image.I to retrieve intensity plane
for i0 in range(40):
  p = image.Get(i0*10,i0*10)
  p += 100
  if p>255: p=255
    image.Set(i0*10,i0*10,p)

image.SetImageMatr('Image')
Example 23: Implementing a tcp/ip Socket Server
If you want to implement TCP/IP communication using sockets, you can use Python and the socket API. The socket API is a BSD implementation and is well documented in the Python help system.
- Using sockets, you have to decide if your Scorpion application is going to be the server or the client.
- This example shows how you can be a server.
- Example 31 shows a tcp/ip client.
Note that the ScorpionSocket class implements a complete client server functionality.
More about SPM - Scorpion Python Module
Look in Central.Start for the initialization code which sets up the serversocket. Then look in the script socktrig for the code that checks if a request is inbound on the serversocket. If so, a clientsocket is used for subsequent operation. If the client socket is closed, a new incoming connection will be allowed. In this fashion the client can connect and close without any protocol handshakes.
What should the client side code look like? In Python you can use this script:
from socket import *
def Trigger():
    ip='localhost'
    port=9901
    csock=socket(AF_INET,SOCK_STREAM)
    csock.settimeout(1.0)
    csock.connect( (ip,port) )
    csock.send('PartPresent')
    print csock.recv(100)
    csock.close()
The example is contained in the example profile SocketServer.zip. The example requires python 2.3 or higher to be installed.
Socket Server - server side
Central Start
import sys
from socket import *
ip='localhost'
port=9901

ssock=socket(AF_INET,SOCK_STREAM)
ssock.settimeout(0.2)
ssock.bind ( (ip,port) )
ssock.listen(1)
csock=0
connected=0
tries=0
Central Stop
ssock.close()
SockTrig
# called from scheduler
def socktrig():

  import socket

  global csock
  global connected

  if connected:
    # socket is there
    try:
      msg=csock.recv(256)
      if msg=='':
         # socket closed
         print 'Client disconnected'
         csock.close()
         csock=0
         connected=0
      elif msg==GetValue('Trigger.Text'):   # contains PartPresent
        print 'PartPresent'
        ExecuteCmd('GrabExecute','')
      else:
        print 'Unknown command',msg
    except socket.timeout:
      pass                                  #no data in buffer yet, no error condition
    except:
      try:
        csock,addr=ssock.accept()
        csock.settimeout(0.2)
        print 'Client connected',addr
        connected=1
      except:
        print 'Timeout waiting for connection'
  else:
    # accept new connection if not connected
    try:
      csock,addr=ssock.accept()
      csock.settimeout(0.2)
      print 'Client connected',addr
      connected=1
    except:
      print 'Still waiting for connection'
Sending response # sends message in external tool
global csock
if connected:csock.send(GetValue('ResponsePass.Text'))
Example 24: Setting ExternalReference from calculated four points
In this example automatic setting of the four local points in ExternalReference tool is shown.
The following tools are present in the toolbox:
- Calibration - ExternalLogic - hold the calibration state - 1 is calibration mode
- CalibStatus - ExternalText - holds a message that is updated when running this tool
- Point1, Point2, Point3, Point4 - PointFromLines - the actual local points to be added ExternalReference
- ProfileCalibration - ExternalReference

The located points in a laser profile calibration
import SPB
def SetProfileCalibration():
  robCoor = GetTool('ProfileCalibration')

  calib = GetValue('Calibration.Value')

  if not calib :
    SetValue('CalibStatus.Text','Set Calibration Mode')

  else:
    ok = 1
    for i0 in range(4):
      status = GetValue('Point'+str(int(i0+1))+'.Status')
      ok = ok and status == 1

   if not ok :
     SetValue('CalibStatus.Text','Calibration failure')

   if ok :
      spb=SPB.CreateSpb(robCoor.config)
      for i0 in range(4):
      indexStr = str(int(i0+1))
      x = GetValue('Point'+indexStr+'.Point_x')
      y = GetValue('Point'+indexStr+'.Point_y')
      spb.setFloat('Local'+indexStr+'.x',x)
      spb.setFloat('Local'+indexStr+'.y',y)
      robCoor.config=spb.xml
      SetValue('CalibStatus.Text','Calibration Updated')
Example 25: Rotating a reference around in a circle
In this example we rotate a linefinder tool around a circle calculating the min and max radius of the circle.
The following tools are present in the toolbox:
- mref - MoveReference - use to rotate the reference system
- lf - LineFinder - finds a straight line at the outer edges of the circle
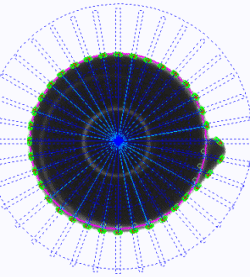
- d1 - PointDistanceTool - calcalulates the distance from radius center to the center of linefinder line

mref = GetTool('mref')
lf = GetTool('lf')
d1 = GetTool('d1')
img = GetImageMatr('Images')
radius = []
for angle in range(0,360,10):  # steps from 0 to 360 degrees in anglesteps of 10
  SetConfigValue('mref.Rotation',angle)
  mref.execute(img)
  lf.execute(img)
  d1.execute(img)
  d = d1.getValue('Distance')
  if d > 5 :
    radius.append(d) # appends valid radiuses to list
    print 'angle - ',angle,' - d = ',d
    print ' list ',radius, ' min - ',min(radius),' max - ',max(radius)
SetValue('Min.Value',min(radius))
SetValue('Max.Value',max(radius))
Example 26: Grabbing an image from an MOXA Video IP Server
A MOXA Video IP Server has an integrated ftp server.
Grabbing an image from the ip video server can be done with the following method
def Grab():
  from ftplib import FTP
  ftp=FTP('193.69.239.119','root','0002D10048BF')
  ftp.retrbinary('RETR video.jpg',open('/video.jpg','wb').write)   # read the video image using ftp
  ftp.quit()
  ExecuteCmd('Grab','Filename=/video.jpg;convert=bw') # grabs the image from file
Example 27: Toolbox Switch
The Scorpion ToolList object facilities easy switching of toolbox.
Central Start
# product type is stored in text register T0
# product defined to 'A' if undefined in Central Start
oldProduct = GetValue('Register.T0')
if oldProduct == "":
  SetValue('Register.T0','A')
SaveToolbox
#SaveToolbox performs toolbox switching by saving current toolbox and loading new toolbox
def SaveToolbox(newProduct):
  GetToolList().save('toolbox.spb',GetValue('Register.T0')) # store
  SetValue('Register.T0',newProduct)
  GetToolList().load('toolbox.spb',GetValue('Register.T0'))
Toolbox Switch
SaveToolbox('B') # sets current toolbox for product "B"
Example 28: ColorMatcher Iteration
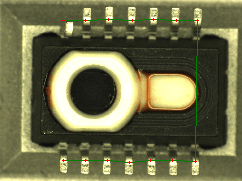
The methods calculates the coverage of the color “glue” within the points.
- Below the glue on the pins on the chip is checks.
- The check locations are stored in an ExternalPolygon tools.

#moving a color matcher along the path defined in a polygon
img = GetImageMatr('Top')
points = eval(GetValue('glue_pinspolygons.Polygon[1]'))
name = 'glue_pins_cm'
coverage = ProcessCM(img,name,points)
SetValue('Coverage.glue_pins',coverage)
Example 1: Calculate the coverage of a color

# img - name of image
# name - name of color matcher
# points - path
def ProcessCM(img,name,points):
  cm= GetTool(name)
  ref = GetTool(name+'_ref')
  count = 0
  for pt in points:
    try:
     #print 'ProcessCM - ',pt
     SetValue(name+'_ref.Value_x',pt[0])
     SetValue(name+'_ref.Value_y',pt[1])
     ref.execute(img)
     cm.execute(img)
     if cm.getValue('Color') == 'glue':
       count = count +1
       DrawMarker(name+'_ref',0,0,'Red',8,18)
    except:
      pass
  if len(points) > 0:
    return count * 100 / len(points)
  else :
    return 0
Example 29: Audio notification
This example shows how to play a wav file.
The winsound python module is a part of standard python - this means that python must be installed.
def AudioNotification():
  from winsound import PlaySound, SND_FILENAME
  try:
     PlaySound('ahooga.wav',SND_FILENAME)
  except:
      pass
Example 30: Resampling using non-linear calibration
Activate a modal windows MessageBox from within Scorpion. Requires : python and python for windows extentions to be installed.
# note that a valid windows handle is retrieved from the result panel.
import win32api,win32con
win32api.MessageBox(GetResultPanel().handle,'Press OK to continue','Automatic Inspection Complete',win32con.MB_OK)